QuickBooks is the most prominent accounting software working for the various company proprietors and serving them with the best facilities for bookkeeping and preservation of accounts. For years, QuickBooks has been the most excellent choice among its users. QuickBooks deals with the activities ensuring full safety to the accounts. Not only this, but it also has highly advanced and new features that make your tasks easier.
In this article, we will determine how to set up a multi-user network in QuickBooks desktop. You can discover the various processes to set up a network environment or a multi-user setup just by following the procedures given in this post.
Read also: What is QuickBooks Update Error 15215?
What is Multi-user network in QuickBooks Desktop?
Multi-user network basically allows more than one person to work on a single company file at the same time. This feature offered by QuickBooks desktop saves a lot of time and makes work simpler and more productive. Multi-user network in QuickBooks desktop is beneficial for the firms that have large number of employees and every employee asks for random access to the QB software and company file. In order to set up multi-user network in QuickBooks desktop, the user needs to have a separate licensed copy of QuickBooks installed in all the system.
What are the Methods to Setup Multi-User Network?
QuickBooks program provides all its users to have various accesses to the data file all over the network. But, each user should install the software separately. Different accounts allow different access like:
- QuickBooks Pro recognizes a maximum of 3 users to simultaneously access a file
- QuickBooks Premier allows a maximum of 5 users to concurrently access a file
- Enterprise Solutions allows a height of 30 users to simultaneously access a file
See Also: What is QuickBooks Desktop Error 6123, 0? (Causes & Solutions)
Requirements before setting up a Multi-user network
- Installed up users for the Company file– Each user is advised to set-up the users before going for the Multi-User network.
- One should examine the Windows file permissions- The user should log in as an admin to seek all the permissions.
- Always verify your Database server manager- Remember to turn on the QuickBooks database server manager before proceeding to the multi-user network.
Basic steps to Set-up the Multi-User Network in QuickBooks
Checkout the following methods to set-up the multi-user network in QuickBooks desktop.
Method 1: Download and install the QuickBooks Desktop
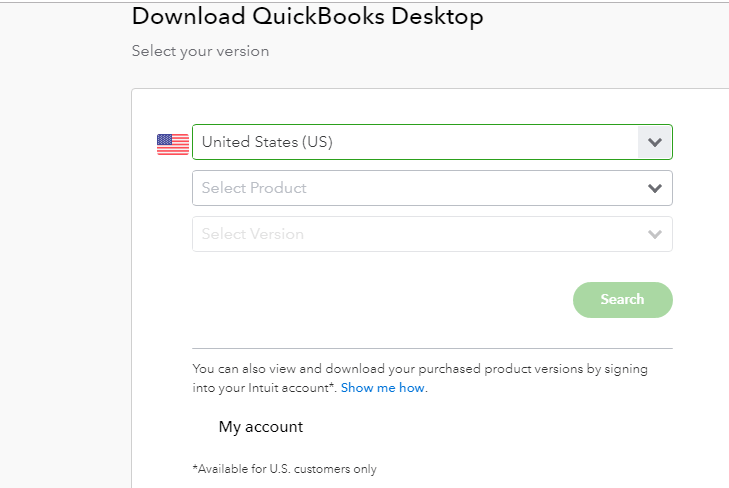
- First, Download the QuickBooks software and save it as a file.
- Then, Install the downloaded QuickBooks software in the system.
- Choose the Multi-User Host installation.
You might also like: Fix the QuickBooks Installation Errors 1904, 1402
Method 2: Switch on Multi-user Hosting
- Open the QuickBooks software.
- Update the QuickBooks company file to a new version if required.
- Now go to the file then click on Utilities and then click Host multi-user access.

Important: (If you are previously hosting multi-user set up then, directly move to the next step.)
You may also like: How to Fix the QuickBooks Error 1321?
Method 3: Switch on folder and Windows access permissions to share company files
- Firstly Right-click on the folder that contains the company file
- After that go to the Properties and then choose Security and then click on Edit option.
- Then choose QBDataServiceUserXX and choose Full Control, then click on Allow option.
- Now hit a click on ‘Apply‘ button, and then click OK button.
- Finally set up Windows access permissions to share company files.

On windows 10, 8 & 7
- First of all, the user is required to tap on the Window+R keys simultaneously, in order to open the File Explorer tab.
- Moving to the next step search and right-click the folder that contains the company files.
- Once performing the above step, tap on the Properties > Sharing > Share Add options respectively.
- The next step is to select the corresponding QBDataServiceUserXX, where the XX depicts the particular version of QuickBooks that you currently use.
- The last and final step is to set the permission level to Full Control for both the users, after which the user is has to tap on the Share option.
See this also: Troubleshooting Steps for QuickBooks Error C=1304
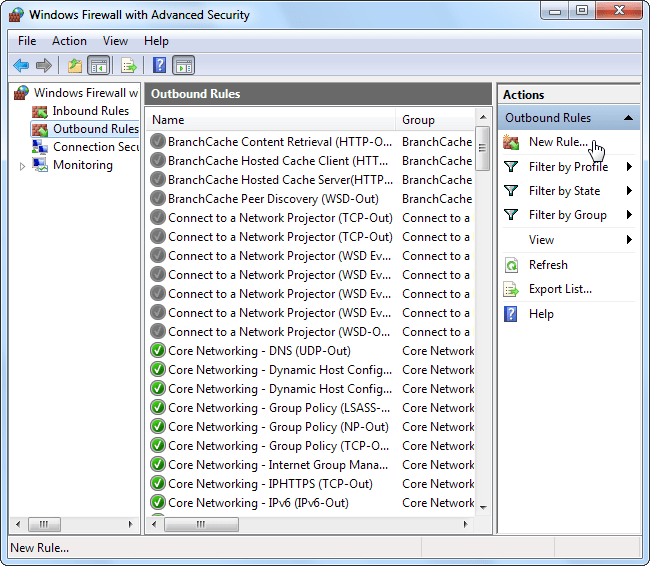
Method 4: Configuring the firewall and security settings for the desktop
- In this process, the first step is to open the Start menu, after that the user is required to check the ‘Firewall‘.
- After that, the user is required to opt for Windows Firewall, followed by opting for Advanced Settings option.
- The next step is to right-click the Inbound Rules, and then select the ‘New Rule‘ option. Also, tap on the Port and Next options respectively.
You may also read: How to Overcome QuickBooks Error Code 6189, 816?
- Now, the user is required to check out the TCP option, and then type in particular ports that are required for the QuickBooks year version that you are using.
- Moving ahead, do not forget to select the ‘Allow the connection‘ option.
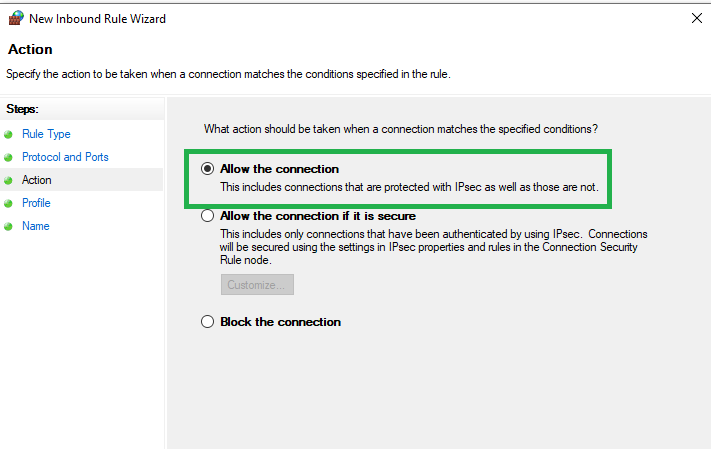
- Once done with that, the user is required to check-mark all the profiles, and switch to the other step by selecting the Next option.
- In this step, assign a name to the rule and then hit the Finish option, once done with naming process.
- To end this process, the user is required to open QuickBooks Desktop once again that too in multi-user mode or over your network.
Read this also: Recover Important Data From QuickBooks Enterprise
Method 5: Check your file, followed by Setting up the QuickBooks database server manager
- To begin with, the user should visit Start button > Programs > QuickBooks respectively.
- After that, tap on the QuickBooks Database Server Manager.
- Followed by Selecting the Scan Folders tab.
- And the next step is to tap on the Add Folder option.

See this also: How to Resolve QuickBooks Error Code 6000?
- Moving ahead, the user is required to opt for the folder that contained the company file and after that, hit OK. In order to add some extra folders, the user is required to go for the Add folder option.
- The next step in this process is to tap on the Scan button in order to begin the scanning process.
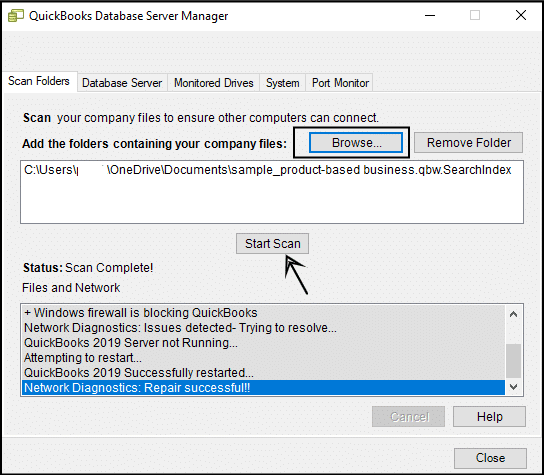
- The final step is to hit the Close option, once the process comes to an end.
Read Also: How to Resolve QuickBooks Error 3140?
Method 6: Insert the Windows Admin Rights to permit the Configuration of Multi-User access
On Windows 10:
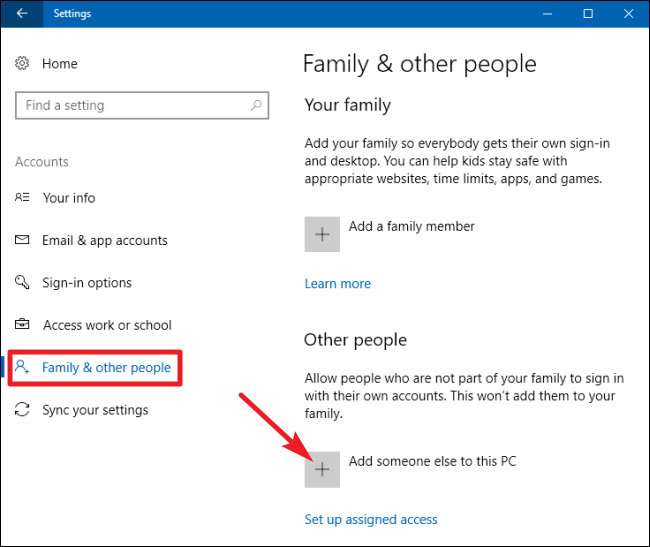
- The very first step is to select ‘Start‘ menu > Settings > Accounts > Family & other users respectively.
- Moving to the next step, the user is required to choose the ‘Add someone else on this computer’ option.
- Then, pick the “I don’t have this person’s sign-in information” option at the foot of the page, followed by inserting a user without Microsoft account.
- After that, the user is required to assign a new Name and Password to the account.
- Now, choose the Finish option.
- The next step is to provide the Administrator authorities to the new user.
- Moving to the next step, choose the newly created account, followed by selecting the account type.
- Coming to the end of this process, the user is required to select the Admin tab that could be seen in the drop-down list.
- Finally, choose the OK option, in order to Save changes.
You’ll also like: Resolve the QuickBooks has stopped working error
On Windows 8 and 7:
- Firstly, tap on Ctrl+R keys tabs simultaneously, followed by opening the Control Panel.
- The next step is to select the User Accounts > Manage another Account > Create a new account respectively.

- And then lastly, the user is required to type in the user name, followed by choosing the Administrator tab and then tapping on to the ‘Create‘ option.
You may also read: How to Fix QuickBooks Update Payroll Error 403?
Method 7: Another solution is to begin with a business file located on a remote computer
- To start with the solution, the user is required to visit the QuickBooks file menu and then choose ‘Switch to Multi-user Mode‘.

- The next step in the process is to select ‘Yes’ option, in the Multi-user set up hosting window.
- Followed by hitting OK on the Multi-user setup information window.
- To end this process, the user is required to add the expected users by going to Company > Set up Users and Passwords > Set Up Users > Add User respectively.
See Also: How to solve QuickBooks rebuild is not working error?
Winding up!
This brings us to the end of this post. We believe that the information provided in the post might be helpful in setting-up the multi-user network in QuickBooks desktop. In case of any difficulty or in case any of your queries remained unanswered, then do not hesitate to speak to our QuickBooks enterprise technical support team and discuss the issue.
Just ring up at +1-844-521-0490, and leave the rest on our team of experts and certified accounting professionals. It would be our pleasure to assist you!
You might also like:
What is QuickBooks Error 80070057?
Easy Steps to Download and Use QuickBooks Component Repair Tool